Hey Guys, today I am going to show you how to create a WordPress site on AWS with terraform tool.
Task-3) Statement: We have to create a web portal for our company with all the security as much as possible.
So, we use the WordPress software with a dedicated database server.
The database should not be accessible from the outside world for security purposes.
We only need the public WordPress for clients.
So here are the steps for proper understanding!
Steps:
1) Write an Infrastructure as code using Terraform, which automatically creates a VPC.
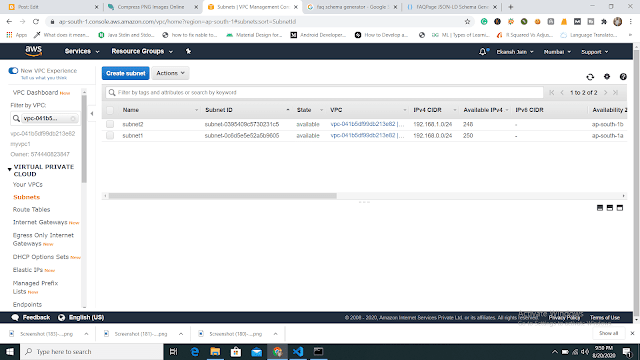
2) In that VPC we have to create 2 subnets:
a) public subnet [ Accessible for Public World! ]
b) private subnet [ Restricted for Public World! ]
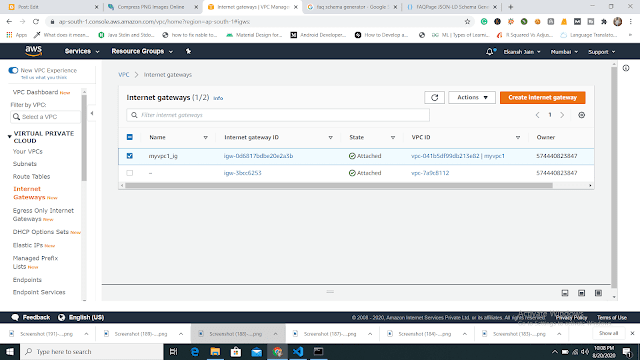
3) Create a public-facing internet gateway to connect our VPC/Network to the internet world and attach this gateway to our VPC.
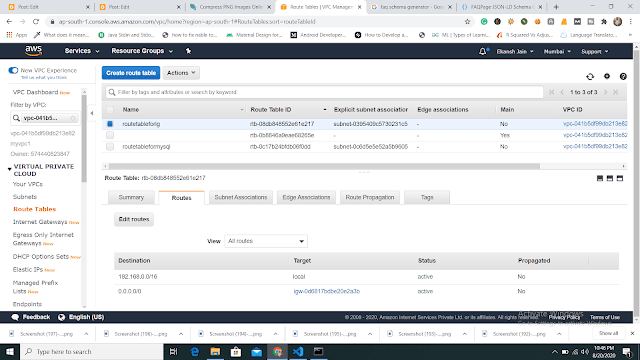
4) Create a routing table for Internet gateway so that instance can connect to the outside world, update and associate it with the public subnet.
5) Launch an ec2 instance that has WordPress setup already having the security group allowing port 80 so that our client can connect to our WordPress site.
Also, attach the key to the instance for further login into it.
6) Launch an ec2 instance that has MYSQL setup already with security group allowing port 3306 in a private subnet so that our WordPress VM can connect with the same.
Also, attach the key with the same.
Note:
- WordPress instance has to be part of the public subnet so that our client can connect our site.
- MySQL instance has to be part of a private subnet so that the outside world can't connect to it.
- Don't forget to add auto IP assign and auto DNS name assignment options to be enabled.
- Try each step first manually and write Terraform code for the same.
- This will give u a proper understanding of the workflow of tasks and the task is complete.
Solution of Task-3
1) First, we are going to create a VPC. So that I can launch my instance on it.
 |
| launching vpc |
 |
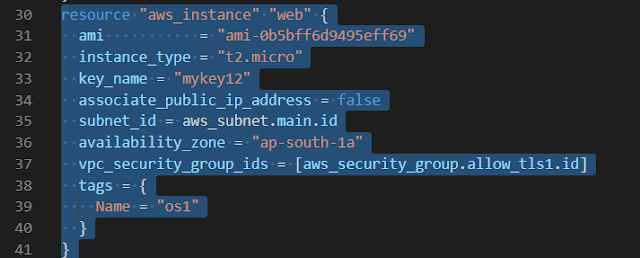
| output of launching PVC 2) Now we are going to create two subnets one is for public access and another one is for private purposes. Note: The above image shows to launch a "web" instance in the private subnet. Note: The above image shows to launch a "web1" instance in the public subnet. 4) Now we are going to create a public-facing internet gateway to connect our VPC/Network to the internet world and attach this gateway to our VPC. Note: The above image shows that the internet gateway created. 5) Create a routing table for Internet gateway so that instance can connect to the outside world, update and associate it with the public subnet. Note: The above image shows that the routing table created and has access to the public world. 6) Now we already created a WordPress setup instance(web1) already. Now we are allowing security groups for port 80 so that our client can connect to our WordPress site. Note: The above image shows the security group for allowing public access. 7) Now we already created MYSQL setup instance(web) with a security group allowing port 3306 in a private subnet so that our WordPress VM can connect with the same. Note: The above image shows the output of security groups. Now using putty we can access the WordPress setup instance and we can easily do an ssh and we can ping google. Here's the output of my blog: That's it till now we successfully launch the WordPress site. Github Code: Task 3 and Task 4 code See this blog for more knowledge: https://www.technicalej.in/2020/08/how-to-access-private-subnet.html |


No comments:
Post a Comment
If you have any doubts, Please Comment down