Hey guys, in this blog I am talking about internal features of AWS like routing table and NAT gateway.
I am going to explain some amazing services of AWS.
Task-4
Perform task-3 with an additional feature to be added that is NAT Gateway to provide the internet access to instances running in the private subnet.
Performing the following steps:
1. Write an Infrastructure as code using Terraform, which automatically creates a VPC.
2. In that VPC we have to create 2 subnets:
1. public subnet [ Accessible for Public World! ]
2. private subnet [ Restricted for Public World! ]
3. Create a public-facing internet gateway to connect our VPC/Network to the internet world and attach this gateway to our VPC.
4. Create a routing table for Internet gateway so that instance can connect to the outside world, update and associate it with the public subnet.
5. Create a NAT gateway to connect our VPC/Network to the internet world and attach this gateway to our VPC in the public network
6. Update the routing table of the private subnet, so that to access the internet it uses the nat gateway created in the public subnet
7. Launch an ec2 instance that has WordPress setup already having the security group allowing port 80 so that our client can connect to our WordPress site. Also, attach the key to the instance for further login into it.
8. Launch an ec2 instance that has MYSQL setup already with security group allowing port 3306 in a private subnet so that our WordPress VM can connect with the same. Also, attach the key with the same.
Note: WordPress instance has to be part of the public subnet so that our client can connect our site.
MySQL instance has to be part of a private subnet so that the outside world can't connect to it.
Don't forget to add auto IP assign and auto DNS name assignment options to be enabled.
Solution of Task 4
1) First, we are going to create a VPC. So that I can launch my instance on it.
 |
| launching vpc |
 |
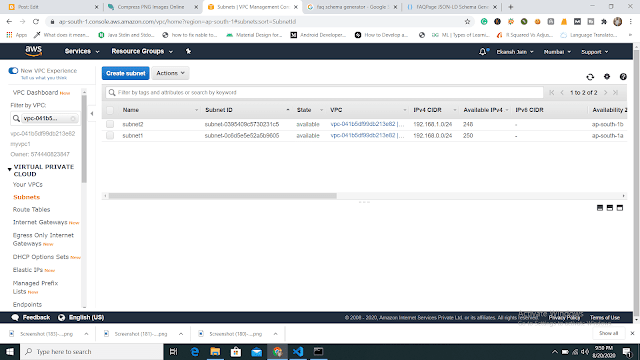
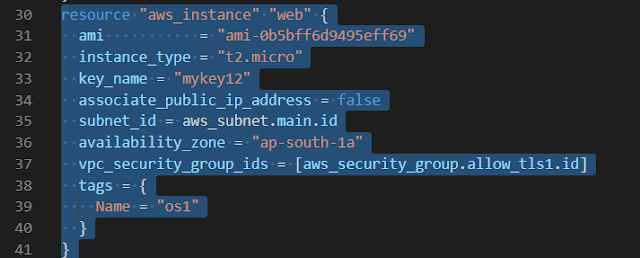
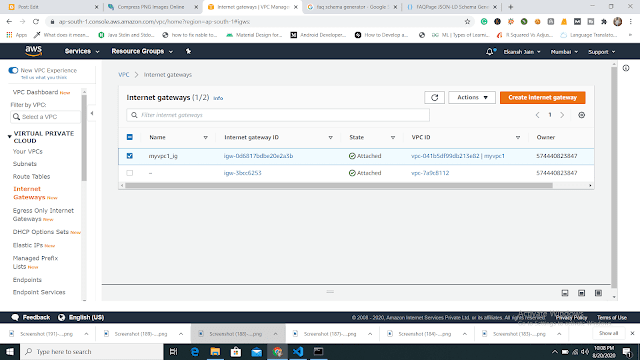
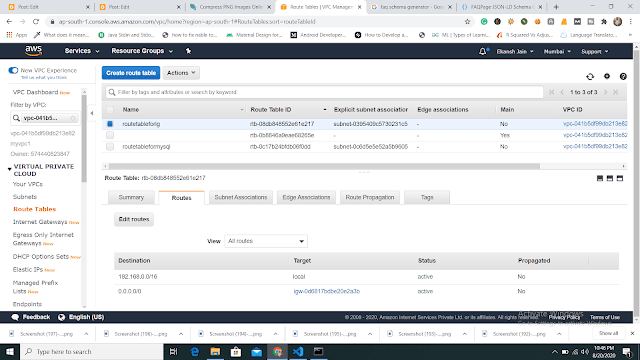
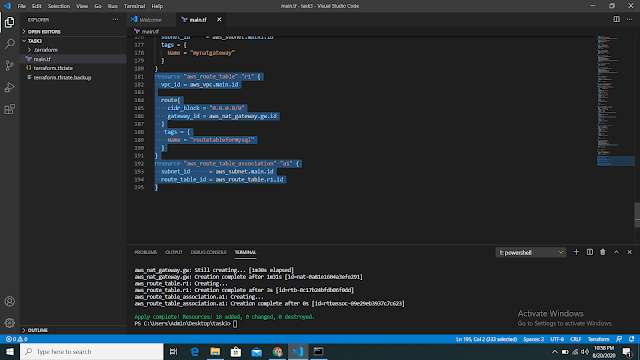
| output of launching PVC 2) Now we are going to create two subnets one is for public access and another one is for private purposes. Note: The above image shows to launch a "web" instance in the private subnet. Note: The above image shows to launch a "web1" instance in the public subnet. 4) Now we are going to create a public-facing internet gateway to connect our VPC/Network to the internet world and attach this gateway to our VPC. Note: The above image shows that the internet gateway created. 5) Create a routing table for Internet gateway so that instance can connect to the outside world, update and associate it with the public subnet. Note: The above image shows that the routing table created and has access to the public world. 6) Create a NAT gateway to connect our VPC/Network to the internet world and attach this gateway to our VPC in the public network Note: NAT Gateway successfully created. 7) Update the routing table of the private subnet, so that to access the internet it uses the nat gateway created in the public subnet Note: Terraform code is shown above. Note: Now our private subnet has access to go outside but nobody can come inside because we are using NAT Gateway. 8) Now we are going to create a bastion host so that our bastion host can go inside the MySQL instance for performing some changes. The below image shows that the bastion host successfully created. Now through the bastion host, we can easily enter the MySQL instance and perform some operations. Now before doing ssh we have to transfer a key to the bastion host with the help of the WinSCP tool and then change the mode so that we can access MySQL instance. The below image is the output that the bastion host can ssh to the MySQL instance securely. That's it. Github Code: Task 3 and Task 4 code For the Previous blog Click here - https://www.technicalej.in/2020/08/how-to-create-wordpress-site-on-aws.html |









No comments:
Post a Comment
If you have any doubts, Please Comment down