
Task1: Flutter App Development‼️
1. Create a flutter app.
2. Use assets (eg. audios and videos).
3. The app will have to play these audios and videos from Assets.
4. Also, add Features to play audio and video from the Internet(Network).
5. Create buttons like play, pause, and stop for audio and video both.
Today I am going to show some basic coding of creating Music App(demo app).
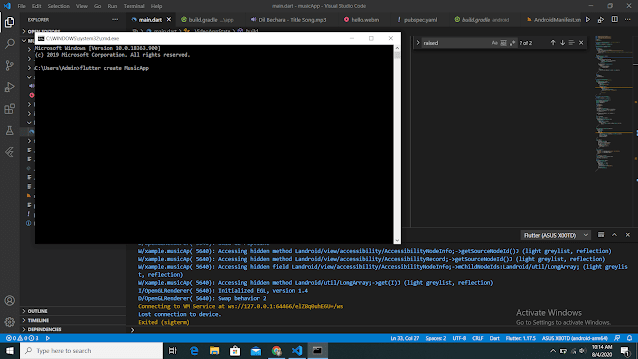
1. Create a flutter app
You can create a flutter app using a cmd console,
just enter into your local directory then run the command 'flutter create MusicApp'.
 |
| Create a Flutter App |
2. Use assets (eg. audios and videos)
With the help of the assets folder, we can run the audio and video from our local path of the Flutter App.
") |
| Using Assets |
3. The app will have to play these audios and videos from Assets
Now I am showing you to play a song using an assets folder.
") |
| Assets folder (song+video) |
In the left side corner of the above image, as you can see there is an assets folder in which one song and one video are reside.
Now add the dependency of AudioPlayer and Video player from pub_dev website.
 |
| The dependency of AudioPlayer and Video player |
Now I am showing you the main part of our App i.e main.dart file
First Import some files:
import 'package:flutter/material.dart';
import 'package:audioplayers/audioplayers.dart';
import 'package:audioplayers/audio_cache.dart';
import 'package:video_player/video_player.dart';
void main() {
runApp(MyApp());
}
Code of Audio Play using Local Assets:
class MyApp extends StatelessWidget {
// This widget is the root of your application.
@override
Widget build(BuildContext context) {
return MaterialApp(
debugShowCheckedModeBanner: false,
home: Scaffold(
appBar: AppBar(
title: Text("MusicalApp"),
),
body: Column(
children: <Widget>[
RaisedButton(
child: Text("Music On"),
onPressed: () {
AudioCache player = AudioCache();
player.play('Dil Bechara - Title Song.mp3');
},
),
//Text("hello")
],
)));
}
}
Code of Video Play using Local Assets with Play and pause Floating button:
class VideoApp extends StatefulWidget {
@override
_VideoAppState createState() => _VideoAppState();
}
class _VideoAppState extends State<VideoApp> {
VideoPlayerController _controller;
@override
void initState() {
super.initState();
_controller = VideoPlayerController.asset("assets/hello.webm")
..initialize().then((_) {
// Ensure the first frame is shown after the video is initialized, even before the play button has been pressed.
setState(() {});
});
}
@override
Widget build(BuildContext context) {
return MaterialApp(
title: 'Video Demo',
home: Scaffold(
body: Center(
child: _controller.value.initialized
? AspectRatio(
aspectRatio: _controller.value.aspectRatio,
child: VideoPlayer(_controller),
)
: Container(),
),
floatingActionButton: FloatingActionButton(
onPressed: () {
setState(() {
_controller.value.isPlaying
? _controller.pause()
: _controller.play();
});
},
child: Icon(
_controller.value.isPlaying ? Icons.pause : Icons.play_arrow,
),
),
),
);
}
@override
void dispose() {
super.dispose();
_controller.dispose();
}
}
4. Also, add Features to play audio and video from the Internet(Network)
Code of Video Play using Internet with Play and pause Floating button:
class VideoApp extends StatefulWidget {
@override
_VideoAppState createState() => _VideoAppState();
}
class _VideoAppState extends State<VideoApp> {
VideoPlayerController _controller;
@override
void initState() {
super.initState();
_controller = VideoPlayerController.network(
"https://flutter.github.io/assets-for-api-docs/assets/videos/butterfly.mp4")
..initialize().then((_) {
// Ensure the first frame is shown after the video is initialized, even before the play button has been pressed.
setState(() {});
});
}
@override
Widget build(BuildContext context) {
return MaterialApp(
title: 'Video Demo',
home: Scaffold(
body: Center(
child: _controller.value.initialized
? AspectRatio(
aspectRatio: _controller.value.aspectRatio,
child: VideoPlayer(_controller),
)
: Container(),
),
floatingActionButton: FloatingActionButton(
onPressed: () {
setState(() {
_controller.value.isPlaying
? _controller.pause()
: _controller.play();
});
},
child: Icon(
_controller.value.isPlaying ? Icons.pause : Icons.play_arrow,
),
),
),
);
}
@override
void dispose() {
super.dispose();
_controller.dispose();
}
}
5. Create buttons like play, pause, and stop for audio and video both
class LocalAudio extends StatefulWidget {
@override
_LocalAudio createState() => _LocalAudio();
}
class _LocalAudio extends State<LocalAudio> {
Duration _duration = new Duration();
Duration _position = new Duration();
AudioPlayer advancedPlayer;
AudioCache audioCache;
@override
void initState() {
super.initState();
initPlayer();
}
void initPlayer() {
advancedPlayer = new AudioPlayer();
audioCache = new AudioCache(fixedPlayer: advancedPlayer);
advancedPlayer.durationHandler = (d) => setState(() {
_duration = d;
});
advancedPlayer.positionHandler = (p) => setState(() {
_position = p;
});
}
String localFilePath;
Widget _tab(List<Widget> children) {
return Column(
mainAxisAlignment: MainAxisAlignment.center,
children: <Widget>[
Container(
padding: EdgeInsets.all(16.0),
child: Column(
children: children
.map((w) => Container(child: w, padding: EdgeInsets.all(6.0)))
.toList(),
),
),
],
);
}
Widget _btn(String txt, VoidCallback onPressed) {
return ButtonTheme(
minWidth: 48.0,
child: Container(
width: 150,
height: 45,
child: RaisedButton(
shape:
RoundedRectangleBorder(borderRadius: BorderRadius.circular(25)),
child: Text(txt),
color: Colors.pink[900],
textColor: Colors.white,
onPressed: onPressed),
),
);
}
Widget slider() {
return Slider(
activeColor: Colors.black,
inactiveColor: Colors.pink,
value: _position.inSeconds.toDouble(),
min: 0.0,
max: _duration.inSeconds.toDouble(),
onChanged: (double value) {
setState(() {
seekToSecond(value.toInt());
value = value;
});
});
}
Widget LocalAudio() {
return _tab([
_btn('Play', () => audioCache.play('Dil Bechara - Title Song.mp3')),
_btn('Pause', () => advancedPlayer.pause()),
_btn('Stop', () => advancedPlayer.stop()),
slider()
]);
}
void seekToSecond(int second) {
Duration newDuration = Duration(seconds: second);
advancedPlayer.seek(newDuration);
}
@override
Widget build(BuildContext context) {
return DefaultTabController(
length: 1,
child: Scaffold(
backgroundColor: Colors.white,
appBar: AppBar(
elevation: 1.0,
backgroundColor: Colors.teal,
title: Center(child: Text('LOCAL AUDIO')),
),
body: TabBarView(
children: [LocalAudio()],
),
),
);
}
}
This is the whole Task -1 Done By Ekansh Jain.
OutPuts:
 |
| Video with Play and Pause Button |
 |
| Audio with Play, pause, and Stop Button |
 |
| Video Playing using Assets |
 |
| Song Playing Using Assets |
Here's the Complete Code:
import 'package:flutter/material.dart';
import 'package:audioplayers/audioplayers.dart';
import 'package:audioplayers/audio_cache.dart';
import 'package:video_player/video_player.dart';
void main() {
runApp(MyApp());
}
//new MaterialApp(debugShowCheckedModeBanner: false, home: LocalAudio()));
class VideoApp extends StatefulWidget {
@override
_VideoAppState createState() => _VideoAppState();
}
class _VideoAppState extends State<VideoApp> {
VideoPlayerController _controller;
@override
void initState() {
super.initState();
_controller = VideoPlayerController.network(
"https://flutter.github.io/assets-for-api-docs/assets/videos/butterfly.mp4")
..initialize().then((_) {
// Ensure the first frame is shown after the video is initialized, even before the play button has been pressed.
setState(() {});
});
}
@override
Widget build(BuildContext context) {
return MaterialApp(
title: 'Video Demo',
home: Scaffold(
body: Center(
child: _controller.value.initialized
? AspectRatio(
aspectRatio: _controller.value.aspectRatio,
child: VideoPlayer(_controller),
)
: Container(),
),
floatingActionButton: FloatingActionButton(
onPressed: () {
setState(() {
_controller.value.isPlaying
? _controller.pause()
: _controller.play();
});
},
child: Icon(
_controller.value.isPlaying ? Icons.pause : Icons.play_arrow,
),
),
),
);
}
@override
void dispose() {
super.dispose();
_controller.dispose();
}
}
class MyApp extends StatelessWidget {
// This widget is the root of your application.
@override
Widget build(BuildContext context) {
return MaterialApp(
debugShowCheckedModeBanner: false,
home: Scaffold(
appBar: AppBar(
title: Text("MusicalApp"),
),
body: Column(
children: <Widget>[
RaisedButton(
child: Text("Music On"),
onPressed: () {
AudioCache player = AudioCache();
player.play('Dil Bechara - Title Song.mp3');
},
),
//Text("hello")
],
)));
}
}
class LocalAudio extends StatefulWidget {
@override
_LocalAudio createState() => _LocalAudio();
}
class _LocalAudio extends State<LocalAudio> {
Duration _duration = new Duration();
Duration _position = new Duration();
AudioPlayer advancedPlayer;
AudioCache audioCache;
@override
void initState() {
super.initState();
initPlayer();
}
void initPlayer() {
advancedPlayer = new AudioPlayer();
audioCache = new AudioCache(fixedPlayer: advancedPlayer);
advancedPlayer.durationHandler = (d) => setState(() {
_duration = d;
});
advancedPlayer.positionHandler = (p) => setState(() {
_position = p;
});
}
String localFilePath;
Widget _tab(List<Widget> children) {
return Column(
mainAxisAlignment: MainAxisAlignment.center,
children: <Widget>[
Container(
padding: EdgeInsets.all(16.0),
child: Column(
children: children
.map((w) => Container(child: w, padding: EdgeInsets.all(6.0)))
.toList(),
),
),
],
);
}
Widget _btn(String txt, VoidCallback onPressed) {
return ButtonTheme(
minWidth: 48.0,
child: Container(
width: 150,
height: 45,
child: RaisedButton(
shape:
RoundedRectangleBorder(borderRadius: BorderRadius.circular(25)),
child: Text(txt),
color: Colors.pink[900],
textColor: Colors.white,
onPressed: onPressed),
),
);
}
Widget slider() {
return Slider(
activeColor: Colors.black,
inactiveColor: Colors.pink,
value: _position.inSeconds.toDouble(),
min: 0.0,
max: _duration.inSeconds.toDouble(),
onChanged: (double value) {
setState(() {
seekToSecond(value.toInt());
value = value;
});
});
}
Widget LocalAudio() {
return _tab([
_btn('Play', () => audioCache.play('Dil Bechara - Title Song.mp3')),
_btn('Pause', () => advancedPlayer.pause()),
_btn('Stop', () => advancedPlayer.stop()),
slider()
]);
}
void seekToSecond(int second) {
Duration newDuration = Duration(seconds: second);
advancedPlayer.seek(newDuration);
}
@override
Widget build(BuildContext context) {
return DefaultTabController(
length: 1,
child: Scaffold(
backgroundColor: Colors.white,
appBar: AppBar(
elevation: 1.0,
backgroundColor: Colors.teal,
title: Center(child: Text('LOCAL AUDIO')),
),
body: TabBarView(
children: [LocalAudio()],
),
),
);
}
}
Future Scope
In the future, I will add the list of all songs which are available on the Local Directory as well as provide one Search Bar, through which we can add songs in our App from the internet.
Github Link for code
Also Read:

No comments:
Post a Comment
If you have any doubts, Please Comment down