Hye, Everone Today I am going to share my one of the best training experience on the topic of Elastic Kubernetes service.Enable GingerCannot connect to Ginger Check your internet connection
or reload the browserDisable in this text fieldEditEdit in GingerEdit in Ginger
I thank Vimal Daga Sir, as he helps me to perform my task of EKS Training. I feel very happy to be a part of his amazing Training. Task: Perform the EKS operation, create a web application, and connect that with EFS and show the monitoring.
So today I show you the way how I can Use Amazon EKS service, how can I integrate EKS with normal cluster and fargate cluster, integration of EKS with EFS, how can I monitored our cluster using Prometheus and Grafana.
Le's Begin -->
What is Amazon Elastic Kubernetes Service?
It is fully managed Kubernetes service of Aws(Amazon web service).
I can integrate Amazon EKS service with Amazon Services like EBS, EFS, VPC, EC2, and many more.
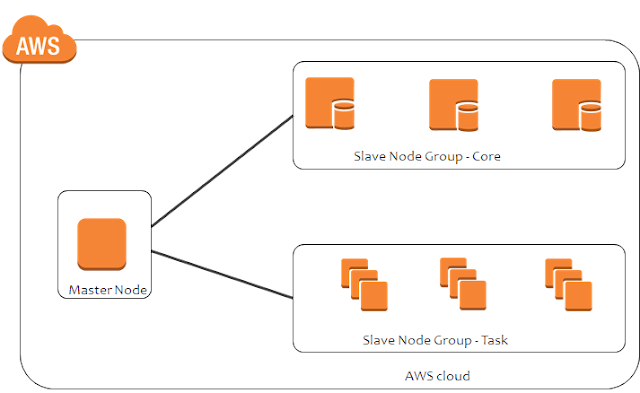 |
| Master and Slave Node Diagram |
The above diagram is the Master and Slave Node Diagram. The master node has an API server, scheduler, and kubelet.
Slave Nodes has a Docker engine and Pods on which our Web server is running.
So in AWS using AMI Image I can launch our Instance.
The Flow is like that if any user wants to connect to the application then user first contact to API server then API server contact to Kubernetes scheduler then Kubernetes scheduler contact to controller node then controller node contact to kubelet and kubelet responsible to contact to Docker engine and docker-engine responsible to launch the OS(operating system).
Controller Nodes help to create a Replica of the Pods.
Master Nodes helps to monitor the worker Nodes(Slave Nodes).
For Business Perspective, Companies need is to secure the File which is in the webserver(/var/www/Html). So to secure the file permanently we people are using Amazon Services like EBS volume and EFS volume.
Using EBS we can store our file Permanent even after deleting the pods our file is still in the EBS volume but there is a small drawback of EBS we cannot launch our EBS in different regions.
Let's suppose our one pod is in the Mumbai regions and another pod is in the Singapore region and we want to connect one EBS to both the region so it's not possible that's why EFS came, then we use EFS (Elastic File Storage) to connect one EFS storage into multiple Region.
Elastic Kubernetes Service
Launching a cluster manually, a little bit harder for the developer. So we use EKS service in just one-click, EKS will launch the whole Cluster including Master nodes and worker nodes.
EKS services are used by Many MNCs like Godaddy, HSBC, Bird, etc.
Amazon EKS can run through the CLI command. It has two methods 1) aws eks and 2) eksctl.
Eksctl is more powerful than aws eks.
Using the EKSCTL command we need to download the file of EKSCTL and set the path to the environmental variable.
 |
| Download the file and set the path |
Now check that eksctl is successfully launched or not. Use the eksctl version command to check.
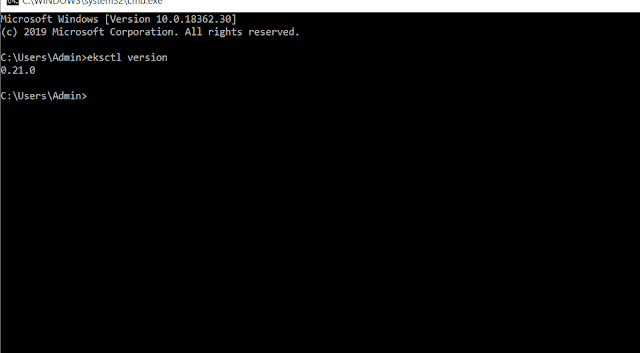 |
| eksctl version command |
Then we are going to launch the cluster using cluster.yml file.
use the command to launch the cluster -->
1) cd Desktop
2) mkdir eksfolder
3) notepad cluster.yml
4) write the code
5) eksctl create a cluster -f cluster.yml
6) wait for 15 min. your cluster will launch
7) You can check your cluster through amazing GUI in the EKS service and through CLI using eksctl get cluster.
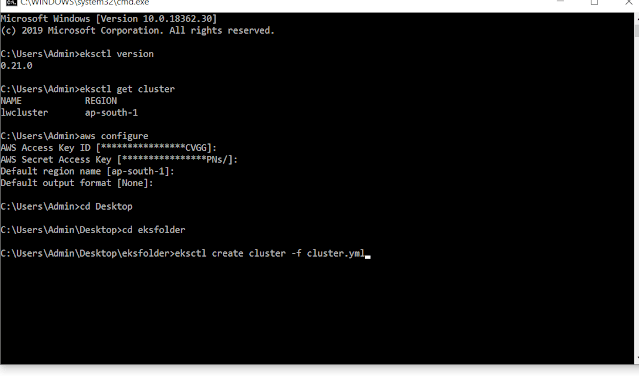 |
| AWS configure and eksctl get cluster |
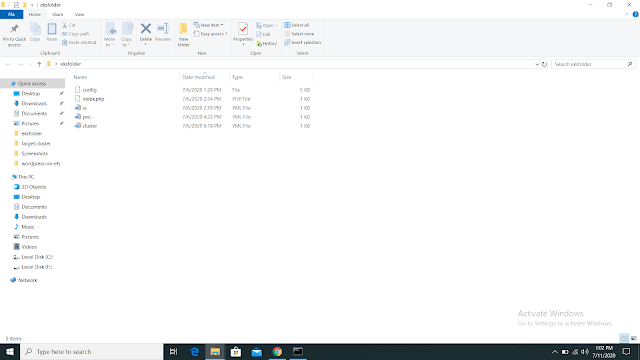 |
| The folder where cluster.yml file resides |
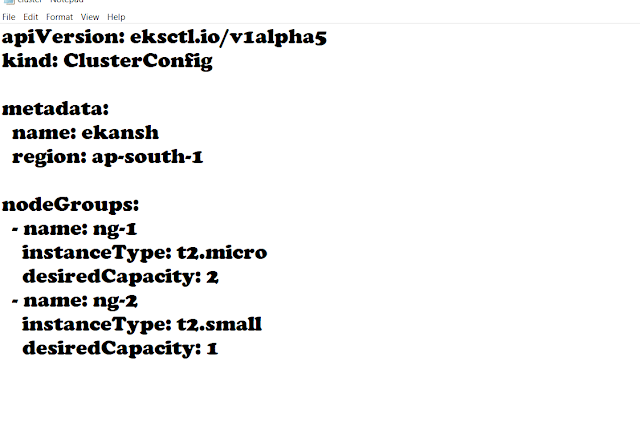 |
| cluster.yml file |
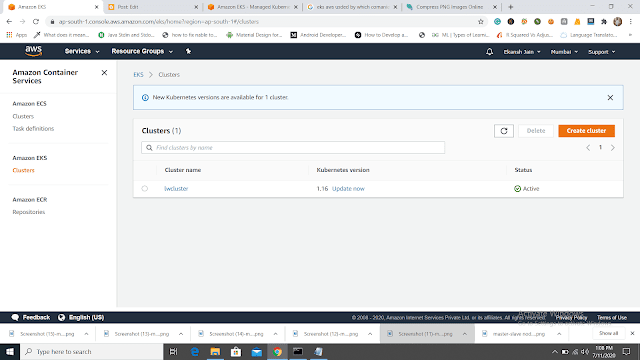 |
| Our "lwcluster" is created |
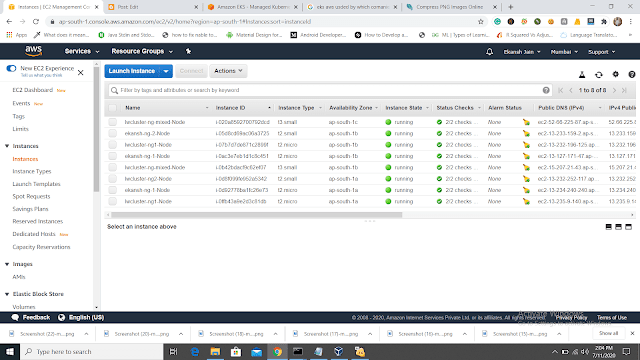 |
| Nodes and Pods are running |
Now to connect with a cluster with need kubectl command, it helps to connect with cluster and kubectl need a username, pass, and config file.
Now, we need to update the config file using -- aws eks update-kubeconfig --name lwcluster.
Now, start the minikube using minikube start then run the command kubectl get nodes and kubectl get pods -n lwcluster.
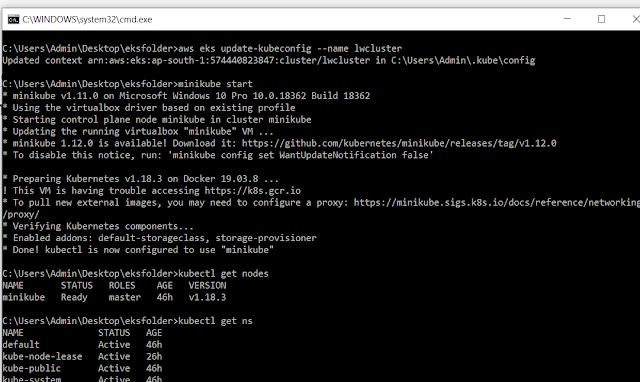 |
| Updation and check the creating cluster |
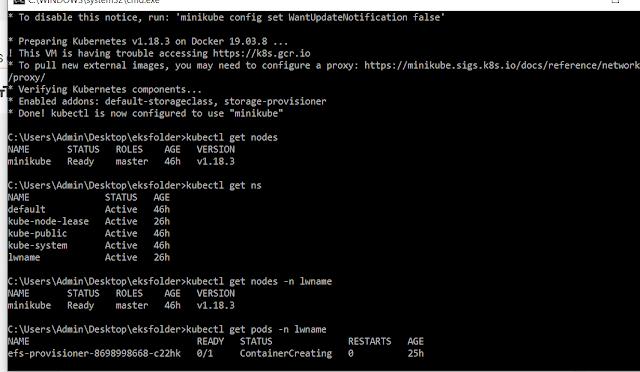 |
| updation and check the creating cluster |
Using Command kubectl cluster-info we can check that our lwcluster is successfully launched.
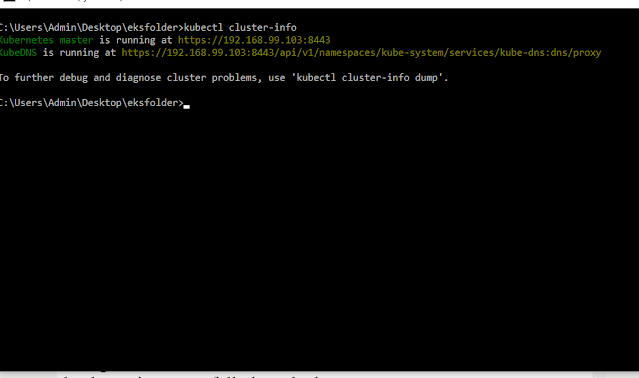 |
| lwcluster is successfully launched |
There are three types of load balancer services -- 1) ClusterIP 2) NodePort 3) Load Balancer.
So I future we are going to use a Load Balancer so that outside users can access our pods.
Now we are going to creating pod and expose it with the LoadBalancer service.
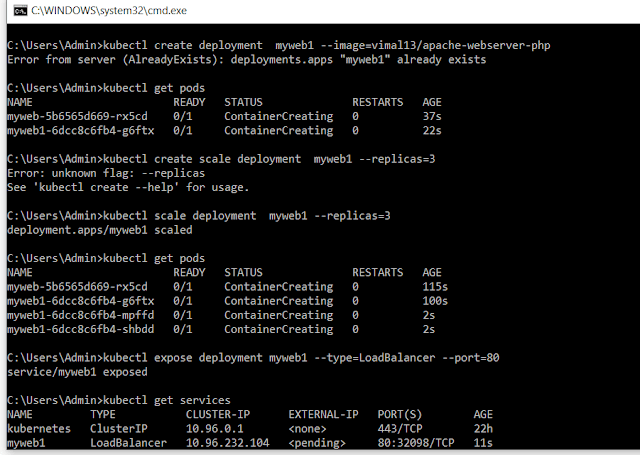 |
| creating pod and expose it with the LoadBalancer service |
Using Load Balancer Ip any user can access the Page.
Now we are going to run PVC and SC file to take the 20Gib Storage from storage class.
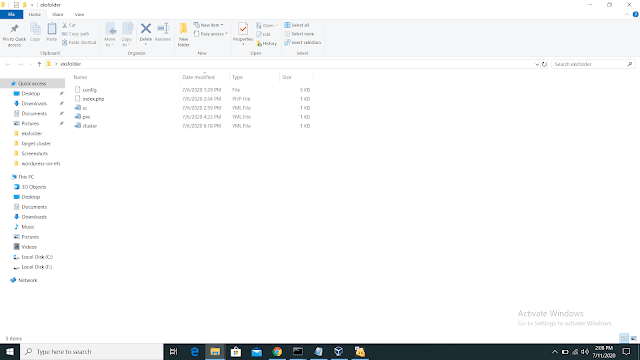 |
PVC and SC files
|
Now we are going to run the files of PVC and SC and claim the volume of 20 Gib.
1) kubectl create -f pvc.yml
2) kubectl create -f sc.yml
3) kubectl get PVC
4) kubectl get sc
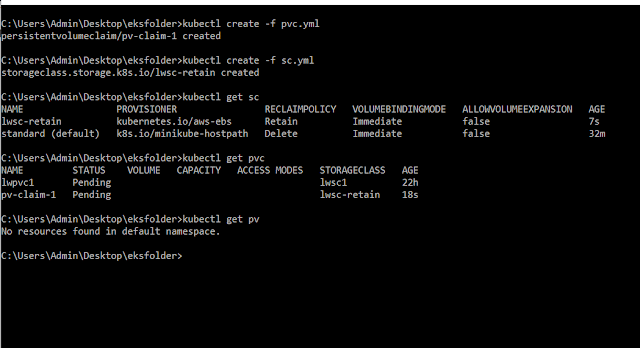 |
| creating PVC and sc |
Now we are having two PVC --1) standard(default) 2) lwsc-retain
now by edit, the file of the standard we have to make our own PVC default. So that we can claim the Persistent Volume.
Till now we have successfully created our own PVC and cluster in the Mumbai region as shown in the above figures.
Now we are going to create a Fargate Cluster.
What is the Fargate Cluster?
Fargate Cluster is a serverless Cluster. We want AWS to manage our worker Nodes so that anytime if the developer needs some resources, AWS manages.
In Cluster, we need CNI service so that one pod of one Node can interact with another pod of another Node.
Now I am going to showing how to create fargate-cluster using fcluster.yml file.
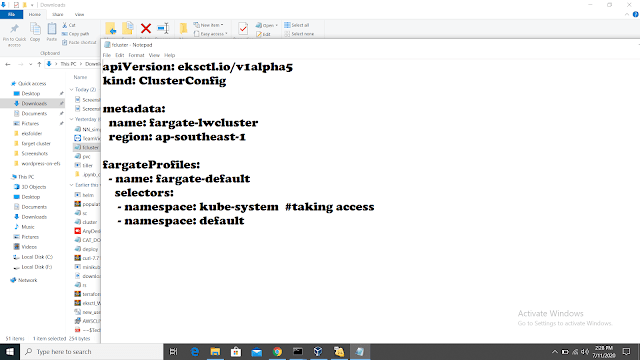 |
fcluster.yml file
|
Now run the fcluster.yml file in Singapore region because in the Mumbai region fargate cluster is not supported.
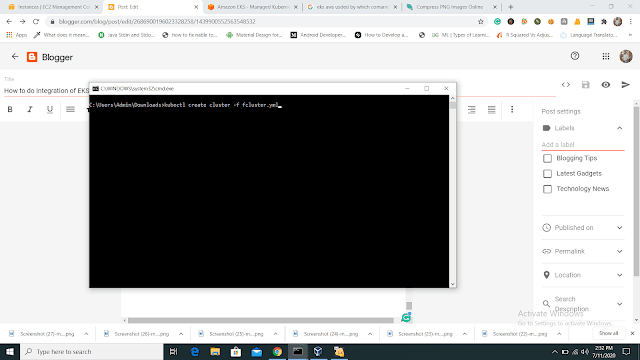 |
| creating fargate cluster |
Our fargate cluster is successfully launched.
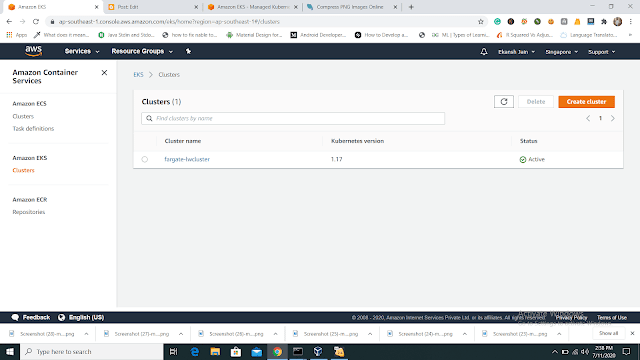 |
Fargate Cluster has been successfully launched
Using some command we can see more details like-- 1) kubectl get ns for Namespace 2) kubectl get pods -n Kube-system -o wide
Now I am going to deploy two web-server 1) WordPress and 2) Mysql.
Using some Files we are going to deploy the whole setup. The below image is of Files which I am going to run.
Before Running these files you should do some changes in the create-efs-provisioner file. Changes to be made: 1) Change the File_System_ID. 2) Change the server name of NFS.
Run the files using kubectl create -f .
Now we are going to create EFS and adding pods to them. Now create a secret key using kubectl create secret generic mysql-pass --from-literal=password=redhat. Then update the config file using aws eks update -kubeconfig --name lwcluster and AWS eks update -kubeconfig --name fargate-lwcluster.
Now your fargate cluster will be ready soon.
Note: If the cluster will not be launched, try to install the amazon-efs-utils package in each running instance.
Using kubectl get the svc command you can take an Ip of Load balanced and can access a WordPress dashboard
Now to monitoring our cluster, we can use Prometheus or Grafana. To install these use commands -- Before Run below command you need to understand the helm
What is the Helm?Helm is a Package(chart) of Kubernetes through which we can install Jenkins, Prometheus, grafana, and many more tools.
1) helm init 2) helm repo add stable https://kubernetes-charts.storage.googleapis.com/ 3) helm repo list 4) helm repo update 5) kubectl -n kube-system create serviceaccount tiller 6) kubectl create clusterrolebinding tiller --clusterrole cluster-admin --serviceaccount=kube-system:tiller 7) helm init --service-account tiller --upgrade 8) kubectl get pods --namespace kube-system 9) kubectl create namespace prometheus 10) helm install stable/prometheus --namespace prometheus --set alertmanager.persistentVolume.storageClass="gp2" --set server.persistentVolume.storageClass="gp2" 11) kubectl get svc -n prometheus 12) kubectl -n prometheus port-forward svc/flailing-buffalo-prometheus-server 8888:80 13) kubectl create namespace grafana 14) helm install stable/grafana --namespace grafana --set persistence.storageClassName="gp2" --set adminPassword = redhat --set service.type=LoadBalancer ConclusionThat's it. I successfully show the creation of clusters and integration of EKS with NFS and many more.
|
or reload the browserDisable in this text fieldEditEdit in GingerEdit in GingerEnable GingerCannot connect to Ginger Check your internet connection
or reload the browserDisable in this text fieldEditEdit in GingerEdit in GingerEnable GingerCannot connect to Ginger Check your internet connection
or reload the browserDisable in this text fieldEditEdit in GingerEdit in Ginger


No comments:
Post a Comment
If you have any doubts, Please Comment down